
REPAIR ARTICLES
No House Wrap? Learn How to Prevent Leaks
Your home's exterior plays a crucial role in both aesthetics and protection. From addressing water-related issues to upgrading siding materials, each aspect requires careful consideration to ensure a cohesive and durable result. In this comprehensive guide, we will explore various scenarios and solutions in Chester County PA to enhance and protect your home's exterior.
Addressing Roof Leaks and Water Seepage
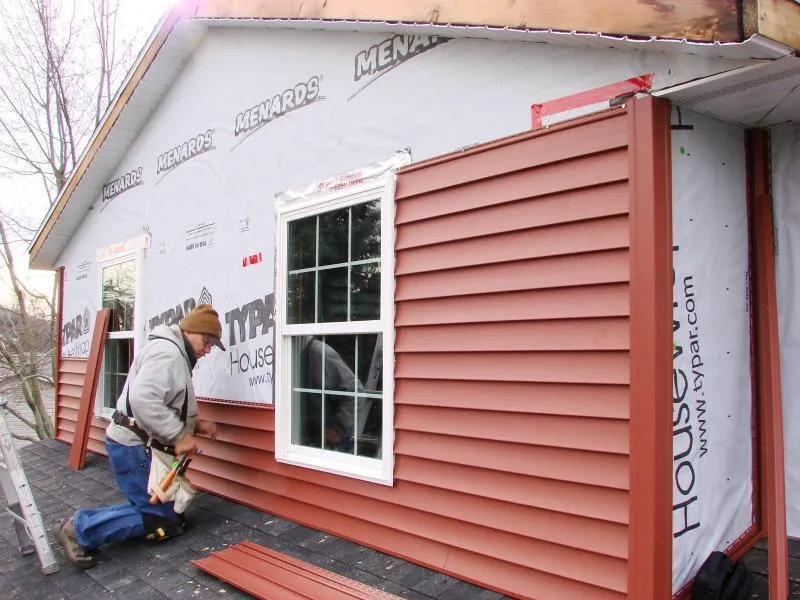
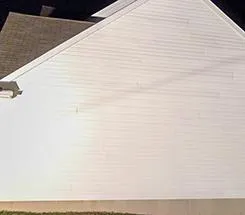
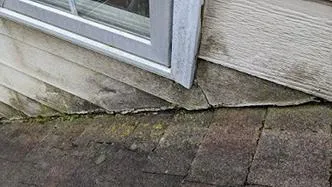
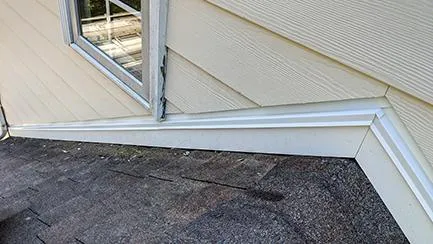
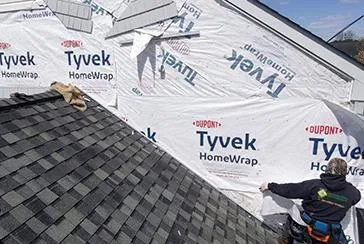
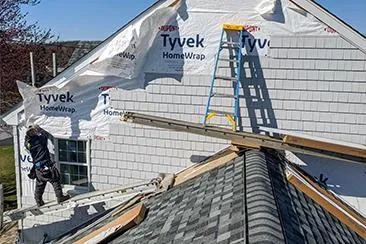
The absence of a house wrap, due to the previous builder's shortcut, resulted in a situation where effectively stopping the roof leak became challenging. We recently dealt with water seeping in below a window, causing damage to a client's ceiling in Landenberg and compromising the tape joints in the room.
Our priority was to address this issue and restore the affected layers. However, the lack of a house wrap and the use of straight OSB left us with no layers to fix. It's important to take note also that Tyvek or similar materials were not required 30 years ago, but they are necessary for this house, although not necessarily for attic gable walls or garages.
To tackle the leaking on the siding part, we decided to take a systematic approach. First, we disassembled the affected areas and carefully applied flashing tape and step flashing up the wall. This process may require the use of pump jacks, ladders, and plex to remove all the siding. By taking these measures, we effectively addressed the water marks and restored the compromised layers.
Why is vinyl siding coming loose in the back of the house?
Vinyl siding coming loose at the back of a house can be a concerning issue for homeowners. One customer from Oxford recently noticed that their siding had started to separate and sought a solution to put it back together. This problem can arise due to various factors, but a common occurrence is when the siding comes apart in the middle of the wall, between the top and bottom sections.
When houses are built, the lumber used may be properly dried, but there is still room for it to shrink over time. In the case of this house, which was built around 2002 and is now over 15 years old, the band board running through the middle of the structure has likely experienced some shrinkage. This shrinkage also affects the studs on both the first and second floors, causing the back of the house to collapse slightly. Fortunately, this is a normal consequence of shrinkage and does not mean the house is in danger of falling down. However, this shrinkage has caused the siding to gap where it was previously tightly nailed together. As the house settles, the links between the siding pieces have loosened, particularly in the most prominent areas.
To address this issue, a solution involves removing the siding from the soffit down to the midpoint where the problem is occurring, possibly a line or two further. By reinstalling the siding and tightening it as the process progresses, the gaps can be eliminated. Since the siding in question is made of vinyl, it is important to consider its high efficiency in expanding and contracting with temperature changes. Vinyl expands significantly in hot weather and contracts in cold weather. It is possible that a recent windstorm may have also contributed to the loosening of the siding.
For the best results, the recommended time to work on vinyl siding is during the fall or spring when the material is less prone to extreme expansion or contraction. By carefully removing the siding from the roof line down to the problem area and reinstalling it, ensuring it is stretched tight, a more durable and secure attachment can be achieved. This approach secures that the siding remains attached during both expanded and contracted states caused by seasonal temperature variations.
Ready to upgrade your wood, stucco, aluminum or vinyl siding exterior?
Embarking on a transformation from worn wood, stucco, or aluminum siding to a fresh and modern vinyl exterior is an exciting upgrade. Recently, our team took on a project from a customer in Oxford involving a front-facing home adorned with dilapidated wood siding that begged for a fresh coat of paint and some much-needed maintenance. The customer also expressed concerns about potential insulation issues and other hidden damages lurking beneath the surface. They envisioned replacing the old siding with sleek vinyl panels, but not before addressing the underlying issues.
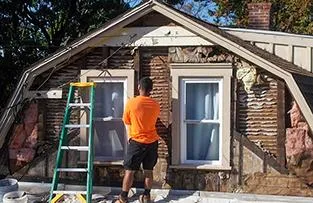
Embarking on a transformation from worn wood, stucco, or aluminum siding to a fresh and modern vinyl exterior is an exciting upgrade. Recently, our team took on a project from a customer in Oxford involving a front-facing home adorned with dilapidated wood siding that begged for a fresh coat of paint and some much-needed maintenance. The customer also expressed concerns about potential insulation issues and other hidden damages lurking beneath the surface. They envisioned replacing the old siding with sleek vinyl panels, but not before addressing the underlying issues.
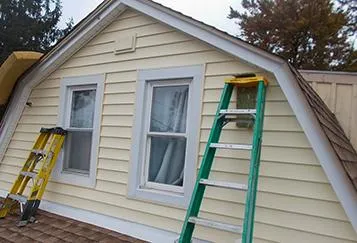
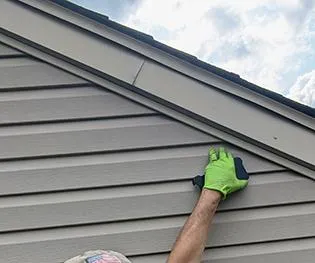
Attention to detail extended to the soffit area beneath the edge of the rake boards. Here, we applied aluminum capping, along with the necessary soffit channel and soffit panels to provide an aesthetically pleasing transition. The aluminum capping was tucked neatly behind the drip edge on the roof, creating a secure and visually appealing finish. Its downward extension enveloped the lower portion of the soffit, securely fastened in place. We replicated this process on the opposite side of the house as well to leave no element overlooked.
Replacing Cedar Siding with Cement Board
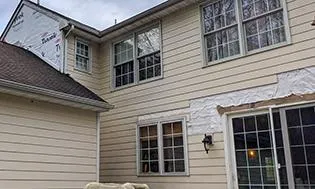
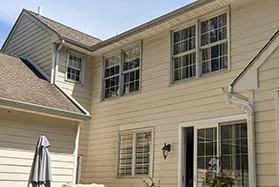
A customer from Landenberg contacted us due to extensive water damage on her cedar siding, particularly between the upper windows. The cedar siding had not been properly maintained, with cracked paint and various other issues. This resulted in significant damage and raised concerns about the sheathing underneath. Upon assessing the situation, it became clear that individually replacing the affected areas would be prohibitively expensive.
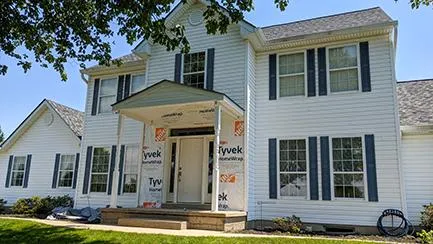
To provide an effective solution, we proposed an alternative approach: completely removing all the cedar siding and replacing it with James Hardie Cement board. This decision ensured an exceptional transition in the appearance of the house while addressing the damage. We carefully dismantled the cedar siding and proceeded with the installation of the required house wrap and rain streets.

To enhance moisture management, we incorporated the use of hydrograph. This system effectively allows any moisture that penetrates the house, whether through condensation, the natural breathing of the home, or other means, to be directed downward and safely expelled through the bottom. This proactive approach helps prevent moisture buildup and potential damage in the future. The final result is a home that retains its original appearance while benefiting from the durability and moisture-resistant properties of the James Hardie Cement board. The customer can now enjoy a renewed exterior without the worry of further water damage or costly individual repairs.
Identifying the Causes of Premature Cement Board Siding Failure
A well-protected forever home starts with a properly installed and maintained roof. Our skilled team here prioritizes the long-term protection of your home by offering comprehensive roofing services.
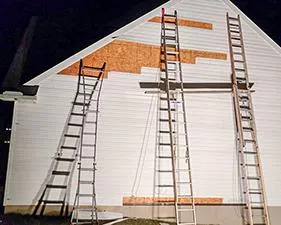
We received a call from a customer in Kennett Square who was experiencing issues with incorrectly installed James Hardie board siding, particularly above the garage roof where noticeable discoloration was present along the roof line. Upon inspection, it was apparent that during the installation process, a crucial aspect was overlooked—a two-inch buffer was required between the siding material and any roof lines. However, a much larger six to eight-inch buffer was mistakenly provided between the siding and the ground. The appropriate solution would have been to use a piece of azek trim or capped aluminum running vertically along the roof line.
To address this issue, we need to remove all the siding above the garage and install the correct trim board at the bottom before proceeding with the reinstallation. Additionally, there were cracked sections of James Hardie siding that needed attention, as well as signs of aging throughout the back side of the house. Furthermore, water damage was observed due to improper gutter setup, resulting in water flowing down from the edge and causing damage to several fuses. Therefore, we have decided to replace the entire back side of the house to ensure a comprehensive and lasting solution.
To achieve the desired result, we carefully replaced the siding from top to bottom, prioritizing the establishment of a two-inch separation along the roof line. This requires the removal of the downspout to allow for the proper installation of flashing. Once the necessary preparations are in place, we will reinstall four courses of the siding, ensuring a secure and aesthetically pleasing outcome.
How siding layers projects your home
When considering the layers of siding for your home, it is important to ensure proper water shedding and protection. We were able to achieve this when a client in Kennett Square contacted us to create a separation between the roof and the James Hardy board. This can be done by inserting a strip of Azek or Versatex, which is a PVC trim board, in that space. Additionally, working with aluminum flashing plays a crucial role in ensuring that all the layers effectively shed water.

To achieve proper water shedding, it is essential to have a continuous metal surface where any water coming down from the roof can be directed to the outside. This is accomplished by strategically placing flashing layers. By using small pieces of aluminum in the appropriate locations, we can redirect water and maintain the continuity of the water control layers. This ensures that any water reaching these layers is effectively moved away from the building.
Once the flashing is correctly installed, it is necessary to add a trim board and a drip cap near the roof to provide further protection. These components, combined with the overlapping metal pieces, create a barrier that prevents water from seeping in from the bottom. Any water that does find its way behind the siding will be directed to the top, where it can safely drain away. This arrangement includes an air gap that allows for proper drainage, preventing water from accumulating like a dam and potentially causing damage.
Once the flashing is correctly installed, it is necessary to add a trim board and a drip cap near the roof to provide further protection. These components, combined with the overlapping metal pieces, create a barrier that prevents water from seeping in from the bottom. Any water that does find its way behind the siding will be directed to the top, where it can safely drain away. This arrangement includes an air gap that allows for proper drainage, preventing water from accumulating like a dam and potentially causing damage.
Preventing Water Damage: Correct Step Flashing and Window Head Flashing Installation
At a customer's residence in West Grove, they noticed water stains in the rooms below where the second-story gable wall meets the first-story roof line, indicating water-related issues. To address this, a roofer was hired to replace the roof, and since then, no further problems have been encountered. Upon investigation, we discovered the following issues: when we stripped down the siding, it became evident that the siding itself was not waterproof. As a result, water would seep behind it and trickle down, particularly where it fell short of the roof's j-channel and the necessary step flashing for the shingles. This problem worsened as we descended along the roofline.
Previously, the step flashing had been improperly installed, with the house wrap positioned behind it instead of in front. This meant that any water coming down onto the roof would flow directly behind the step flashing and into the home for an undesirable outcome. To rectify this, the house wrap had to be removed and repositioned in front of the step flashing. By making this simple adjustment, any water that comes down will be effectively shed, ensuring a watertight barrier. It is essential to avoid reverse layering and ensure proper water tightness.
Now, focusing on the window's upper section, we took the house wrap, sliced it, and inserted the window. Adhesive goop was applied behind the nail flange at the top, securely adhering it to the OSB. Additionally, we applied flashing tape on top, and then the house wrap above the window was layered down and directed behind the j-channel. This arrangement allows any water that flows down to exit the system. A piece of drip cap metal is bent under the extending house wrap, forcing the water outwards. Finally, the j-channel is connected and placed on top, completing the assembly. By carefully arranging layers and repositioning the house wrap in accordance with these proper installation processes, a watertight barrier is created, protecting the property from potential water-related problems.
Introducing the Striking Two-Tone Front Color Scheme:
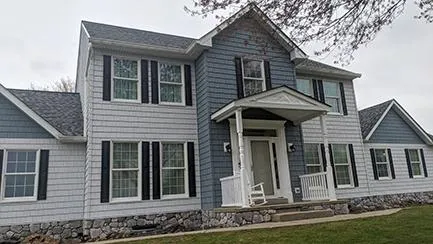
Our client in West Grove had a specific vision for a two-tone color scheme for their siding, requiring delicate attention to detail in coordinating the gable walls. It is crucial that the lines align perfectly as they converge into the cedar shake corner posts. Consistency is key, especially as we move upward, maintaining a fresh appearance along the front of the house. While we have some flexibility with their back of the house, utilizing a standard corner post instead of cedar shake, we still aim for a close match. Unlike the front, the standard corner post has a smooth, uniform texture without distinct lines.
Therefore, if the side wall and the back wall don't align perfectly, it is not easily noticeable due to the visual break provided by the gable wall. To enhance the aesthetic, we opted for a darker blue color on the upper portion, contrasting with the silver gray on the lower section. Our installation process involves wrapping the house and securing the window into the jambs using a layer of sealant on all three sides. Additionally, we apply window flash tape to secure the window's nailing flange.
One notable aspect is the loose piece intentionally left behind, allowing us to install a metal piece behind it. This metal piece extends downward, covering the top edge of the siding and effectively waterproofing it. By redirecting any water that flows down, it collects on top of the siding and exits through the drip cap. This serves as our primary barrier against water, ensuring that all moisture is directed away from the house.
Hire an Experienced, Reliable Contractor
There are a wide variety of contractors to choose from when it comes to getting new siding installed. Not all of them are experienced and reliable. Don't pick the first name you see. Instead, ask your friends and colleagues for referrals, read online reviews, and interview several different companies before making your final choice. You'll be glad that you did.
Whether this is your first time replacing your siding or not, new siding installation is easier than you might think. Take your time to consider all of the factors above and then dive in and get started. Once this project is complete, your house will look amazing and you'll be thrilled with your home all over again.
If you're looking for a siding contractor in Kennett Square, Lincoln University, West Grove, or other surrounding areas, we'd love to help you out. We'll be happy to give you a quote and answer all your questions. Give us a call today at 484-748-7708!
Here's a recent vinyl siding transformation and you can view the whole playlist walking you step-by-step through the process on our youtube channel.